
Images, as pretty and expressive as they are, are one of the main culprits in poor page speed. Incorrectly cropping, formatting and not compressing images can cost your website page visitors and favorable rankings in search. Thankfully, there’s a new(ish) kid on the block, a next-gen image format designed to tackle the page speed crisis. In this post, we answer the question, “What is WebP?” and give you new insights into contemporary image file formats.
Images are typically one of the greatest causes for slow-loading web pages. They not only slow down the loading time, but they can also take up a lot of space and resources on your server. Carefully choosing the file type and compressing them helps in reducing the loading speed, but they can only be optimized so far before the image’s quality suffers. Another option is to use one of the most optimized image file types: WebP.
WebP is a next-gen image file format developed by Google. This file format has actually been around since 2010, but it isn’t widely used and also all that widely known. In the following guide, we’ll discuss the next-gen image format, WebP, and explain how and why you should use them on your WordPress website.
What is WebP?
WebP is a raster image format from Google that’s designed specifically for the web. It provides lossless and lossy compression that allows web designers to show richer images at smaller file sizes.
WebP lossy images use predictive coding to encode the image. With this, it reduces the file sizes by looking at the neighboring pixels to predict the values, and then only encodes the differences. Lossy images are up to 34% smaller than the comparable image as a JPEG.
WebP lossless images reconstruct new pixels using image fragments that have already been seen. If it doesn’t find a match it can use a local palette. Lossless images are 26% smaller than the same image as a PNG. Lossless WebP supports alpha channel (transparency) with a file size that’s 3 times smaller than the comparable image as a PNG.
What is a WebP File?
A WebP file uses VP8 or VP8L image data, and a container based on RIFF. It uses the file extension .webp. The libwebp library is the reference implementation for the WebP spec. You can see the library in the git repository or as a tarball.
Benefits of Using WebP
The main advantage of WebP is the small file size. With this, your web pages will load faster and you’ll use fewer resources from your server. This also means you’ll be able to use larger images with more color without adding to the server’s current load if your visitors are using a browser that supports them.
This new freedom to go wild with images and graphics will also help your web design. Without worrying about each and every pixel and kb, you won’t have to be so conscientious of using smaller areas within your layouts for your images. You can use sizes that work for the design instead of having to make the design fit around smaller images because of page speed or loading times.
How to Add WebP Images to WordPress
Despite the power of WebP images, they aren’t as easily added to the WordPress Media Library. For one, the WebP format is not yet supported in all browsers and requires a fallback image for backward browser compatibility
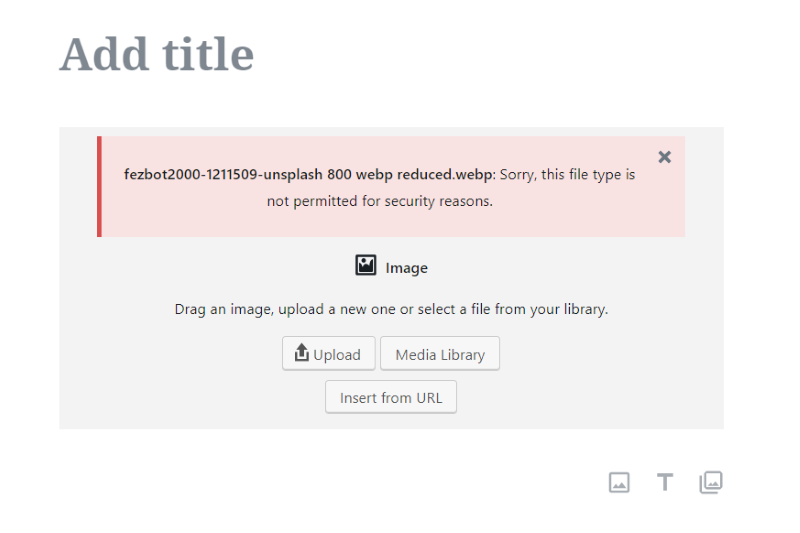
WebP images are natively unsupported by WordPress but there’s a workaround
There are also additional security steps needed when using WebP that prevents WordPress from allowing users to upload WebP images by default. These aren’t the same security concerns as SVG files; WebP files simply need a workaround process before they can be added to the Media Library. Once they are formatted correctly they can be uploaded to WordPress websites.
There are a few ways that you can add WebP images to WordPress. You can opt for:
- The manual route (this requires a bit of elbow grease but nothing too complicated), or
- Use a plugin.
If you’re interested in a quick fix, you can use one of the following plugins rather than meticulously following the manual route.
Manually Adding WebP Images to WordPress
First you need to make sure the images are in the correct format. You’ll need to convert them into WebP.
Then, you need to upload the images to your Media Library.
Converting images to WebP
Before you can begin using WebP images, they need to be converted into the correct file format so that they’re compatible with the WordPress Media Library. To do this, you’ll need an online image converter such as Online-Convert.com.
If you have a site with a few images, you could pull these down, convert and upload the new format. Also, if you’re creating a brand new site, you can easily run the new site’s image content through the converter tool before you upload the images.
To use the converter, simply drag and drop the images in where it says “Drop Files Here”, wait for the conversion process to complete and then download your new image.
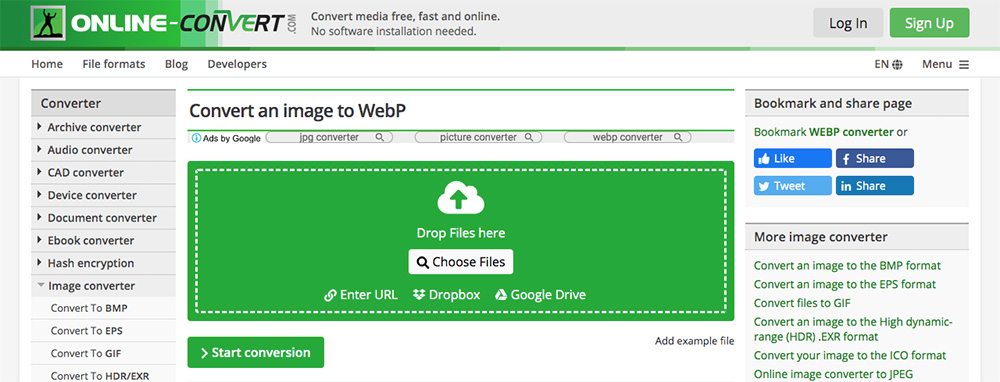
Use an online tool to convert the image to WebP
Convert WebP Images Online
By default, Adobe Photoshop doesn’t allow files to be exported in the WebP format. However, you can add this functionality with a plugin for the program itself. This premium plugin for Adobe Photoshop (not WordPress) must be downloaded and added to the working Photoshop folder on your computer.
Another option is to use a desktop application. Both Webpconv for Windows and WebPonize for Mac are desktop applications that can be downloaded and used offline. These programs can do JPEG to WebP or PNG to WebP conversions.
If you are working on an existing website that already has a span of images in the Media Library, you’ll need a more robust solution to convert the images to next-gen format. For this, you can follow the command line tutorial share in this WebP guide.
Add WebP Images to your Website
Once your images are in the correct format, you can upload them to your website in one of two ways:
- Using SFTP, you can log into the server and add the images into the Uploads folder, bypassing the Media Library, or
- You can edit the functions.php file to enable WebP uploads
Adding WebP Images Using a Plugin
One of the best things about using WebP images as a designer or developer is that you don’t have to do the work of creating the files. Instead, you’ll just need to install a conversion plugin. You’ll upload your normal images in JPEG or PNG formats and the plugin converts those files to WebP to deliver the images to your visitors.
The advantage in this method is you only need to handle file types you’re already used to, and your visitors that can’t use WebP will still receive the original file types. Those who can receive the WebP file type will see faster load times.
Another method is to allow you to upload WebP files to your website. This method is not recommended since not all browsers support this format. This means that some of your visitors would not be able to view your images.
There are several free and premium plugins that convert images to WebP. Here’s a look at a few free options.
EWWW Image Optimizer

Download EWWW Image Optimizer from the WordPress repository
EWWW Image Optimizer is a free plugin with a WebP conversion feature. It generates WebP version of your JPEGs and PNGs. It includes lots of options such as Apache-compatible rewrite rules, and an alternative WebP rewriting option. It’s compatible with both caches and CDNs, and works with the Cache Enabler plugin from KeyCDN.
This one is probably the easiest to use. The built-in WebP features let you use lossy conversion for JPEGs and lossless for PNGs, and the conversion is automatic. All you have to do is install the plugin and enable to feature in the WebP tab. No other setup is required.
ShortPixel Image Optimizer
Download ShortPixel Image Optimizer from the WordPress repository
ShortPixel Image Optimizer is a free plugin that will convert any JPEG, PNG, or GIF to WebP. It uses both lossy and lossless compression. It also works with cache plugins that are WebP aware. It provides WebP images to the browsers that can view them and the other formats to those that can’t.
It also has an option to add the WebP images into the front-end pages using HTML. To do this, you can use the <picture> tag instead of the normal <img> tag. To set it to convert images automatically, simply enable the feature in the Advanced tab. You can restore images if you want.
WebP Express
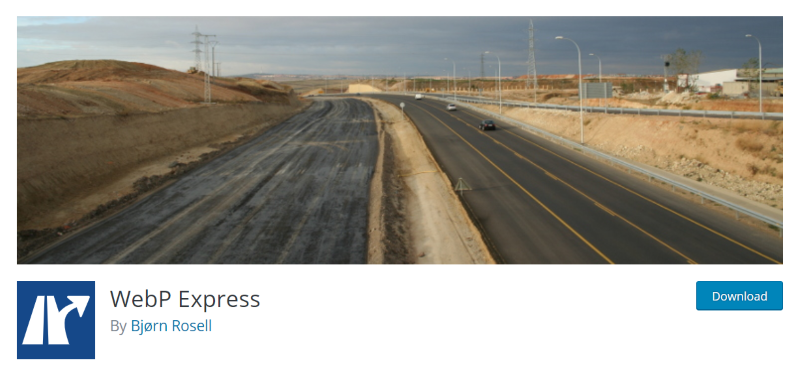
Download WebP Express from the WordPress repository
WebP Express is a free plugin that produces images that are less than half the size of JPEGs. It routes JPEG and PNGs to an image converter to be converted or to the already converted image. It works regardless of how the images got to the server. It works with the media library, galleries, and for theme images that are referenced with CSS.
It doesn’t work with Microsoft IIS server or WAMP, and it hasn’t been tested with multi-site. It does require some setup for the conversion methods, but you have several to choose from. The images will use the conversion method at the top first and if that one fails it will work its way down the list until it finds a method that works with the image. You can drag them in the order you want it to use them.
Opti MozJpeg Guetzli WebP

Download Opti MozJpeg Guetzli WebP from the WordPress repository
Opti MozJpeg Guetzli WebP is a free plugin that was created with Google Pagespeed Insights in mind. It uses Mozilla MozJpeg, Google Guetzli, and Google WebP image encoders to convert your images. The encoders can be locally installed or you can use the built-in ssh client. It accesses the encoders remotely using a ssh connection to the author’s virtual machine.
It can convert all of your non-alpha channel PNGs to JPEGs. It backs up your images before making changes. You can revert your images back any time you want.
An Example of WebP Images in Action
Below is a demonstration of WebP images in action. For my examples, I wanted to show a few quality and size differences, so I’m saving the same image in various formats and quality levels to compare. I’m actually showing screenshots of the images in my image editor.
For these examples, I’m using Paint.NET with a WebP plugin. These images are reduced in size a little more when I upload them to this website, so they might look a little more different from each other than they actually do, but hopefully, they’ll provide a good comparison.

Here’s an image I took from Unsplash. This is the JPEG file, reduced to 800 pixels wide and saved at 98% quality. It’s a 237kb file.

Here’s the same image saved as a PNG. It’s a 1.09mb file.

Here’s the same image saved as a WebP. It’s also saved at 98% quality. It’s a 199kb file.

Here’s the same WebP file saved at 34%. It’s a 35kb file. It’s difficult to see any difference between the images.
Ending Thoughts
That’s our look at what is WebP and what is a WebP file. This format reduces image files sizes considerably, saving a lot of space and improving loading times. The main disadvantage is that it’s only compatible with a few browsers. Fortunately, you can use a plugin that converts your current library to WebP for those that use compatible browsers while serving the common file types to those that can’t view the WebP format.
WebP is an interesting format. Since it’s from Google, I expect that it will eventually catch on and replace the image standards of the web. It’s been around since 2010, so even though it’s been around for a while, it’s moving slowly. Savings in file size and loading speed make it worth using plugins to convert images to serve to those visitors that can use them; it’s free speed.
Do you use or plan to use WebP images in your website designs? Let us know what you think about WebP in the comments.
I need convert images from webp to png with widget´s wordpress, help
Hi Dick! Not sure what you are looking to accomplish. Could you share a little more about how you are trying to use Widgets? Did you want a tool to compress images from the frontend of your website?
Thank you for writing such an insightful article. I was just wondering if you could tell me how I can upload WebP images without plugins
Will converting all my images to WebP help in any way with seo, my PageSpeed Insights score is low at 25 and because WebP is a google format I’m thinking it may help?
I really didn’t want to use any WP plugins I would rather have pics load from my own source. Also, all the major browsers support WebP apart from safari is it worth serving 2 file types ie jpeg and WebP and let the browser decide which one it likes?
Wonderful Article about WebP and WebP Images in WordPress. But I have a questions what are the steps to follow to make webp images show in WordPress site without plugins ?
Ok am going to try this on my site. And I will be back with the results. I have been trying webp express plugin for a custom built theme.. let me try again.
Just started learning more about webp images while working on my google speed score. Curious which browsers do not support webp images? A lot or just a few? Nice article!
I think you makes a good approach please let us know either it will usable for apps ?
Hello,
Can you please share how to upload .webp image directly
Hello,
Thank you!
Do you know what are the steps to follow to make webp images show in WordPress site WITHOUT plugins?
Thank you
Great information’s. Really so much valuable & informative also. I’ve got my solution’s. Thank u so much for sharing.
I have installed EWWW Image Optimizer but still showing warning like “Serve images in next-gen formats”. Configure the settings and also modified .htaccess. Can i know where can i find a solution?
How about directly uploading WebP images to wordpress?
I’m confussed about the examples you’ve posted…. When I inspect all I can see is that all of the images is .png format. Neither of them seems to be WebP – I’ve even tested in different browsers that I know have webp support.
Does Divi not support webp images?
I also looked into this for testing something. Turns out you do not see a difference in the images because they are all PNGS. Ideally the author will see this and update the site to use the different formats or remove that part of the article. It is extremely miss leading and more people should really look into things that are stated rather than take them as fact.
Have you had any luck with the ewww plugin. I was experimenting with this a month or two ago, and I found many of my images weren’t showing up. I was using the eww plugin.
Oh yes, please let Google take over the image compression algorithm too…
How about WP Compress plugin? Does it do the job?
I have never heard of this option for images before, only plugins/services that auto reduce image sizes for you. Is it still best practice to upload reduced file size for those viewers who cannot view the format?
Awesome blog. Really it is an interesting and informative article. Thanks for sharing this post. – dentist in hartford
Information is nice, thanks for sharing with us.