Extra from Elegant Themes is full of amazing features that make it one of the most comprehensive magazine-style themes on the market today. Because Extra is so feature rich, it can be overwhelming at first to some users.
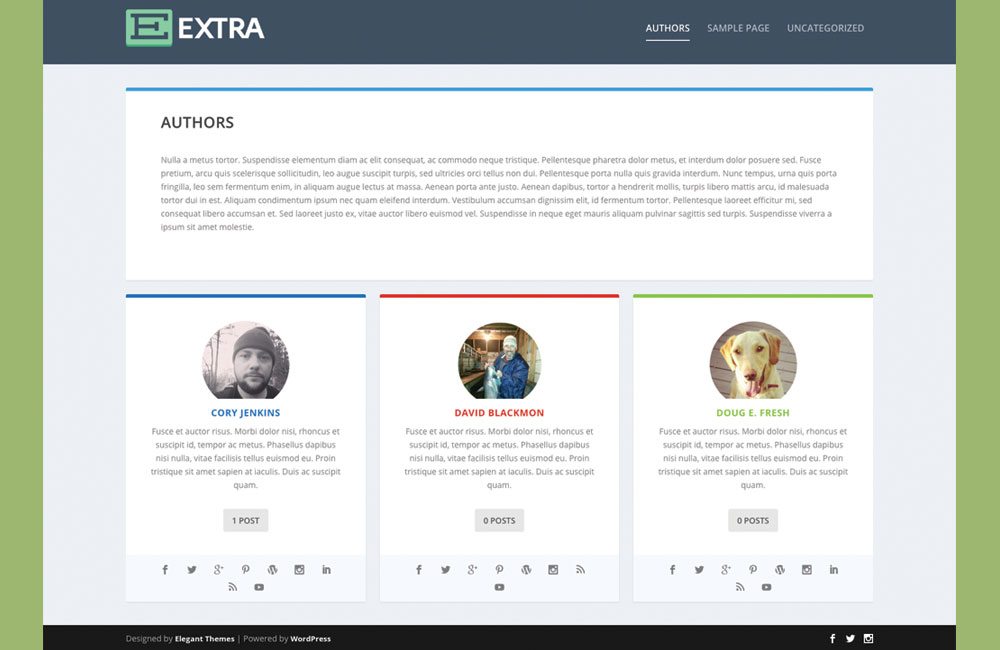
In this first of many blog posts covering Extra’s features, we will explore the ‘Authors’ page template and show you how to set it up to make a beautiful Authors page like the one seen on the Extra Demo Site here >>
1. Setup the user/author profile
The first step we will take is setting up your team’s user/author profiles. From the WordPress Dashboard you will find the ‘Users’ tab. From here you can either select to add a new user or choose one that is already created. After selecting a user, you will see a dashboard full of many options. Here you can designate how you would like the author’s name to display publicly, connect to desired social media accounts, etc. Most of these options are pretty cut and dry, but we will go into more depth on a few of them for you:
The Profile Picture: The profile picture that will appear below your contributed blog posts and on the Authors page is connected to the Gravatar (Globally Recognized Avatar) associated with the email address added to each profile (in the ’email’ field under ‘contact info’). If you or your site’s authors have not yet created a Gravatar then head on over to the site and set one up… it’s pretty easy! https://en.gravatar.com/
Your Custom Author Color: You will notice that each person on the Author page can have their own personal color displayed on the bar above their profile. Under the ‘About the user’ of the profile page you will see a color picker where you can designate the color of your choice.
Biographical Info: The information entered into this section of the profile page will also display on your Authors page. This is your chance to let your readers know who you are, what your experiences are, etc. You can enter as much content here as you’d like, but it’s best to stay concise and relevant. Also, you keep your Author page looking professional and well designed, try and keep each author’s bio around the same length, so the columns don’t outweigh each other.

2. Create and format the Author page
Okay, now that our user profiles are all setup, let’s get to work on creating the Authors page itself…
Add a new page: The first step will be to add a new page and title it whatever you would like. Obviously ‘Authors’ is a logical and popular choice for the title, but feel free to get creative.
Choose the ‘Authors’ template: Once the page has been created you will select the ‘Authors’ template under ‘Page Attributes’. This option will be located in the right-hand column of the page you are editing (see screenshot below).

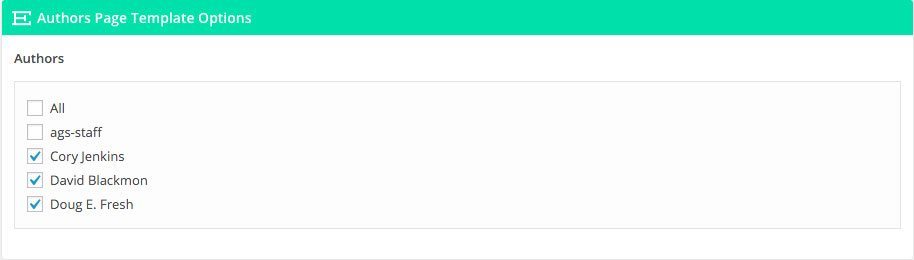
Choose which authors are highlighted: After selecting the ‘Authors’ template you will see a new section appear under a green bar titled, “Authors Page Template Options”. Here you will see a list of authors displayed and you can choose to highlight them all, or customize which ones you would like to appear on the page.
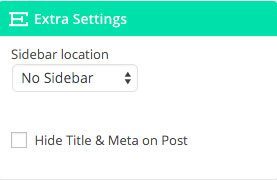
Designate sidebar location: In the right-hand column of the page you are editing you will see a section titled “Extra Options” with “Sidebar location” directly beneath it. Here you can select to have the sidebar appear on the left, right, or not at all. For a full-width look you will want to select “No Sidebar”.
Build the rest of the page: Now you can start designing the rest of the page. Please note that all content added, either with the Divi Builder or not, will appear above the author bios. You will also notice that the content will be placed in a boxed section with a colored border across the top. The color of this border is selected in: Theme Customizer >> General Settings >> Layout Settings.

Check out the video below for a step by step tutorial on how to set up the author’s page.
Now that you have followed and completed these steps, you should have yourself an awesome looking Authors page like the one displayed at the top of this post.
If you have any questions or comments, feel free to drop us a line below!
Looking for even more Extra Theme goodness? Check out the Extra Theme Users Facebook Group!
If I want to add a mailto button, how do I do it? It does not bring that option so I can modify it as a button in Author … it replaces the google + button but it takes the mailto as a URL
I can’t for the life of me figure out why Elegant Themes would create an authors page for which the only option is to list the authors alphabetically. It makes much more sense to put the top contributors on top. There’s no option to do that. I’ve contacted ET support but they say they can’t help me because a change like that would require too much custom code… Bummer.
Hey!! I love the post!! Very helpful. Quick question. I have several upcoming “Guest Posts” but would LOVE if I could have their author information under the blog post instead of mine. However, i don’t want to require them to do anything like set up another email, form a gravatar etc. I totally understand if they will be most more in the future, but many of these are high profile authors who don’t have the time or desire for that. What would you recommend? Thanks!
hi, thank you for this nice tutorial. On my installation, the author page is showing as a single col. instead of 3. How can i change it ?where is the settings.
Hello, it is very difficult to tell the exact reason without having access to your site. Please try (if you haven’t already) changing the sidebar location under “Extra Setting” to “No Sidebar”.
If you are still having difficulty, you may want to contact Elegant Themes for support https://www.elegantthemes.com/forum/
Thanks!